
Medium Format
Medium format refers to the size of your roll of film (or if you’re talking digital, it’s the size of the camera sensor). It really just means that you are shooting on a bigger piece of film than you do with a 35mm camera. The increased size of medium format film means a much larger negative. This will give you finer details and less grain.
Choosing your Right Medium Format Camera
Twin Lens Reflex (TLRS)
TLRs use two objective lens of the same focal length. The photographic objective lens is the one that is used to take the picture. The other lens, called the view lens, is connected to the viewfinder. Most TLRs are fixed focal length, and the more expensive models may incorporate a rudimentary room function. Most TLRs use a leaf shutter system, resulting in high speeds, quiet operation and low shutter vibration. There are also close-up, wide angle and telephoto adapters for TLRs.
Some popular TLRS cameras are: Yashica MAT-124G, Rolleiflex 2.8F, Minolta Autocord and Mamiya C330


Rangefinder
Rangefinder cameras are medium format cameras with a range finder. This negates the waistline, viewing that most TLRs carry. They are also much smaller than TLRs, and allow for easier point and shoot photographs. They tend to have limited focusing ranges, and do not have lenses larger than 180mm or 200mm. Rangefinders are quieter and easier to focus in dim light. They are mostly fixed lens models, but higher range models also provide for interchangeability.
Some popular rangefinder cameras are: Fujica G690, Mamiya 6/7, Bronica RF645, Norita 66 and Pentax 67
WhatsApp Only: +65-8223-7153

Photo . Video . New . Used . Automobile . Lifestyle . Security


Developing your Own Film
Film Developing (Colour)
Film Developing (Colour)
Developing 35mm Color Film at Home: Tetenal Colortec C-41 (Snippet 30)

How I Develop Color Film at Home

A Day of Developing and Scanning Film at Home (Epson V600 + Negative lab pro)
Film Developing (B&W)
Film Developing (B&W)

How-To: Develop Black and White Film

How to EASILY develop (and push) B/W film

ILFORD SIMPLICITY Film Processing Photo Chemicals
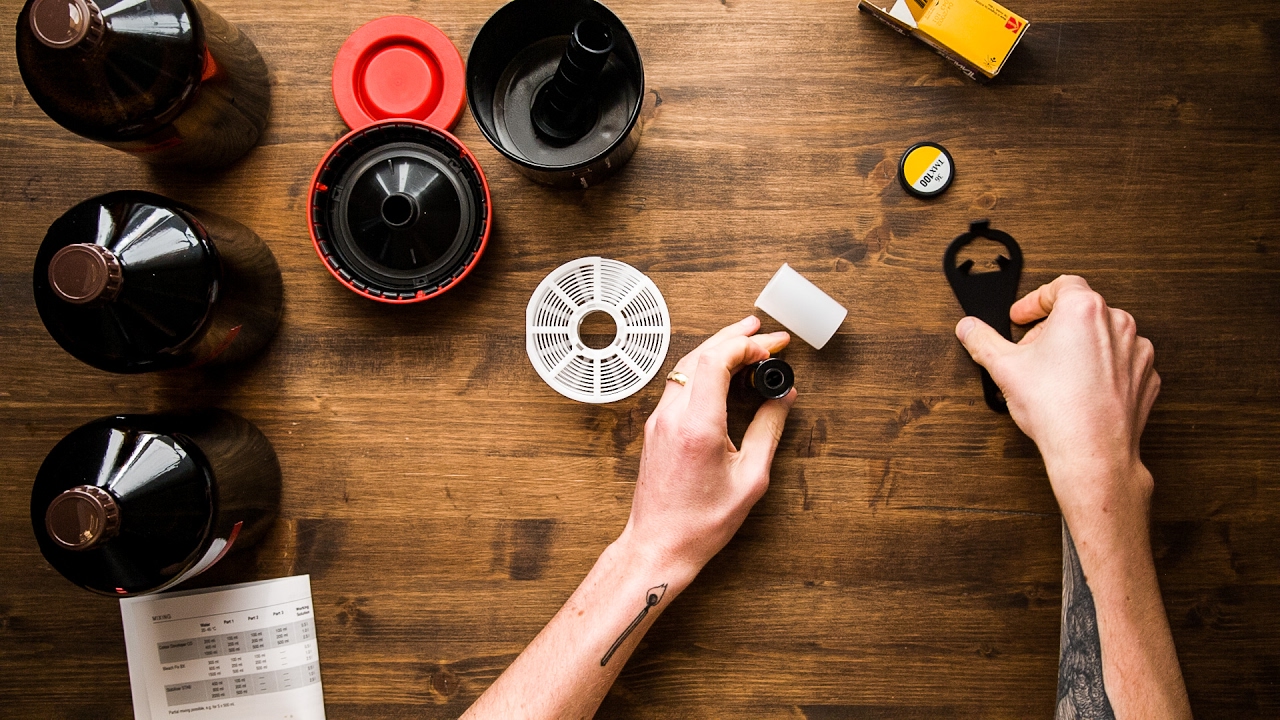
Developing Film: Equipment Guide
Developing Film: Equipment Guide

Comparing Different Paterson Film Developing Tanks

Comparing Different Darkroom Safelights

Comparing Film Reel Systems & How To Load Film (Paterson/AP/Jobo)

![Ilford Simplicity Black and White Starter Pack [Film]](https://static.wixstatic.com/media/98cf9e_c3b1cd6534434cb180603acbe4a75f9d~mv2.jpg/v1/fill/w_395,h_194,al_c,q_85,usm_0.66_1.00_0.01/98cf9e_c3b1cd6534434cb180603acbe4a75f9d~mv2.jpg)


Film Developing Guide for Black and White
1.
Darkroom
This needs to be done in complete darkness. If you don’t have a dark space available, you can use a changing bag. lay your developing tank out in front of you with the lid off and the reel removed. You will also need a film canister opener (for 35mm), some scissors and your film.
2.
Loading Film
Pull out the roll of film. Carefully cut the tongue of the film, leaving you with a straight edge that goes all the way across. Now pick up the reel and make sure you can feel both notches on the outer edge are aligned. You then need to slide the end of the film under the two notches until you feel it catch the sprocket holes. If the film has gone in straight you will be able to turn both sides of the reel in an alternate back and forth motion, which will move the film along as you go. Once the film is on the reel you need to put it in the tank. After the reel is in, put the lid on and turn it until it locks in place.
3.
Diluting Chemicals
You can usually find the dilution ratio for chemicals on its label. With this, you can work out how much you will need in relation to water. You will need 300ml of developer, stop and fix per 35mm film, and 500ml per 120 film.
If your developer has a dilution ratio of 1:9 and you have one 35mm film to develop. You would divide 300ml by 10 (the total of 1+9), and this would tell you that you need to mix 30ml of developer with 270ml of water. Repeat this for the three different chemicals (Stopbath, Fixer and Hypoclear).
Each chemical will also give you the time it takes to work and the temperature it works best at. When processing black and white film the standard temperature is 20°. It’s best to get your water to the right temperature first, then add in the chemistry. Now you can start your film processing.
4.
Water Wash
Fill tank with water and agitate for 2 minutes continuously. Agitate by turning the tank upside down, then back up again. Dump water out of tank.
Note: For every duration that the film is let to rest, bang the bottom of the tank against a hard surface before rest. This will dislodge any air bubbles that have built up on the film.
5.
Developer
Every film and developer combination has a specific developing time so make sure you know how long your combination will need. Set a timer going and slowly pour the developer into the central funnel of the processing tank. Once it is all in, securely fit the flat lid.
Continuously agitate for the first 30 minutes then for 10 seconds every minute until the full development time has passed. As the development time nears the end get ready to pour out your developer. Developers are usually non-reusable so be sure to pour away after each use.
Ps. Refer to the massive development chart for your developing time over here.
6.
Stop Bath
Now quickly pour in the diluted stop bath and close lid. This will completely stop development. Agitate the stop for a minute and pour back into a storage bottle. The stop can be reused many times so don’t waste it. Do a 1 minute water wash thereafter.
Note: Stopbath can be recycled. Discard when strong discolouration appears.
7.
Fixer
Fixer clears all the unexposed film emulsion and fixes the silver in the exposed parts of your image. Fixing time is important as it stabilises the image and makes it light proof.
Total duration for this step is 6 minutes. Pour fixer into tub and close lid. Continuously agitate for the first minute then for 10 seconds every 30 minutes thereafter until 6 minutes timer is up. Pour fixer out of tank. Do a one minute water wash thereafter.
Note: Fixer can be recycled. Discard when strong discolouration appears.
8.
Hypoclear (Optional)
For best results, professional photographers treat processed film with a hypo clearing agent to speed removal of the fixer and allow more effective washing. Fill tank with wetting agent and continuously agitate for 2 minutes.
Note: Hypoclear can be recycled. Discard when strong discolouration appears.
9.
Water Wash
Total duration is 20 minutes. Fill tank and dump tank frequently for the first 2 minutes. Place tank under running water for the rest of prescribed time to remove excess chemicals.
10.
Wetting Agent/ Photo-Flo
After washing its recommended that you soak your film in the wetting agent for a minute or two, this allows the water to slip off the film more easily which helps avoids drying marks. Add wetting agent to tank filled with water. Continuously agitate for 30 seconds and pour out.
Leave films to dry thereafter.
